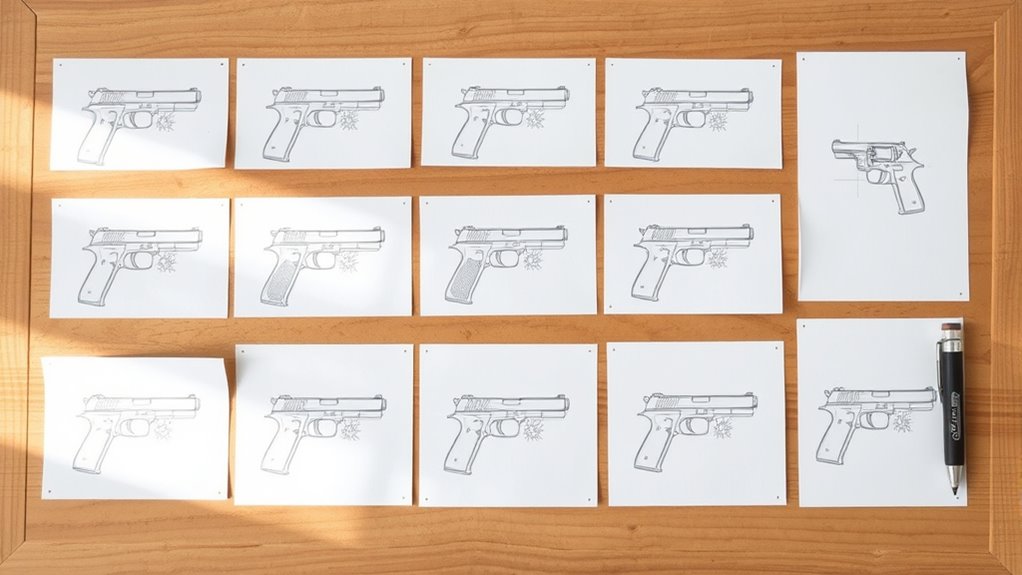
10 Steps to Draw a Gun Perfectly
To draw a gun perfectly, start by creating a basic outline to capture accurate proportions. Focus on sketching the slide, muzzle, frame, and grip to build a solid structure. This foundation helps keep everything in the right place as you move forward.
Next, add important details like the magazine, trigger guard, sights, and hammer. Don’t forget to include serrations and textures — they really bring your drawing to life.
When it comes to shading, keep it consistent to build depth and volume, then layer in highlights and shadows for a stylized effect.
Finally, refine your lines and add your personal artistic touches. Keep practicing, and soon you’ll master every detail and technique involved in drawing guns perfectly. It’s all about patience and enjoying the process!
Key Takeaways
– Begin by sketching simple shapes and establishing accurate proportions for the grip, trigger area, and slide using light, adjustable lines.
Take your time with this step because getting the basics right sets you up for a great drawing.
– Add detailed components like serrations, sights, hammer, screws, and grip textures to enhance realism and structure.
These little details really bring your gun drawing to life, so don’t rush through them.
– Apply consistent shading techniques such as cross-hatching or stippling to create depth and emphasize three-dimensional form.
Shading is key to making your drawing pop, so experiment a bit to see what works best.
– Incorporate highlights and shadows aligned with a fixed light source to boost volume and create a polished, stylized appearance.
Think about where your light is coming from—it makes all the difference.
– Finalize with clean, varied line weights, erase unnecessary marks, and add artistic textures for clarity and unique character.
This finishing touch really cleans up your work and gives it that professional feel.
Start With a Basic Gun Outline to Capture Proportions
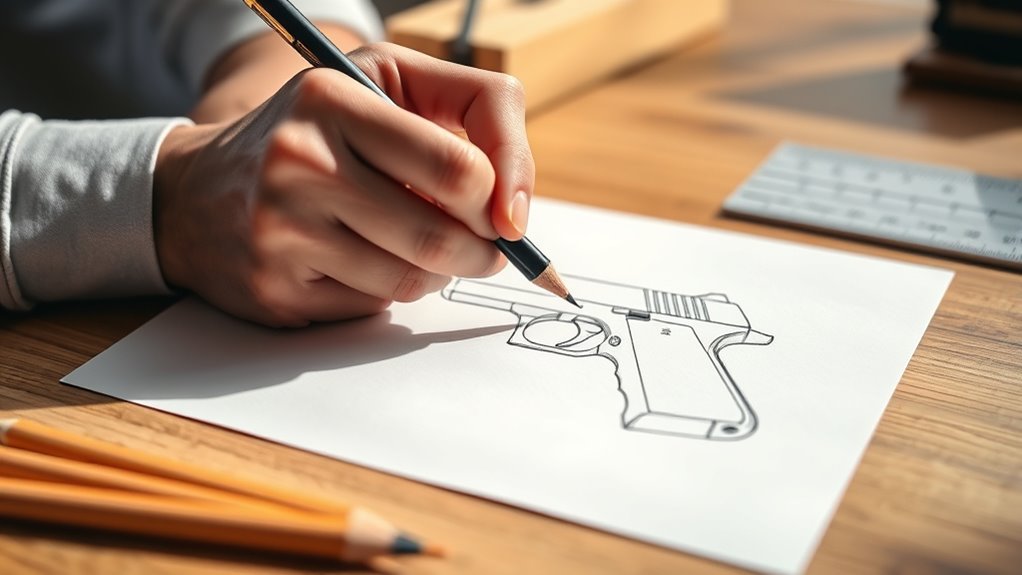
To start drawing a gun perfectly, begin with a basic outline using simple shapes like rectangles and cylinders. These geometric shapes help you capture the gun’s overall form quickly and clearly.
Begin drawing a gun by outlining its form with simple shapes like rectangles and cylinders.
Focus on the proportions between key parts—such as the grip, trigger area, and slide—making sure each relates correctly in size and placement. Use light, loose lines so you can easily adjust as you refine the shape.
Pay close attention to how components like the barrel and grip align, keeping those realistic relationships in mind. And don’t forget to keep checking your sketch against reference images to stay accurate.
This basic outline sets the foundation for your drawing. It makes adding details later a lot easier and helps you achieve a realistic, well-proportioned gun.
Sketch the Slide and Muzzle for the Gun’s Upper Structure
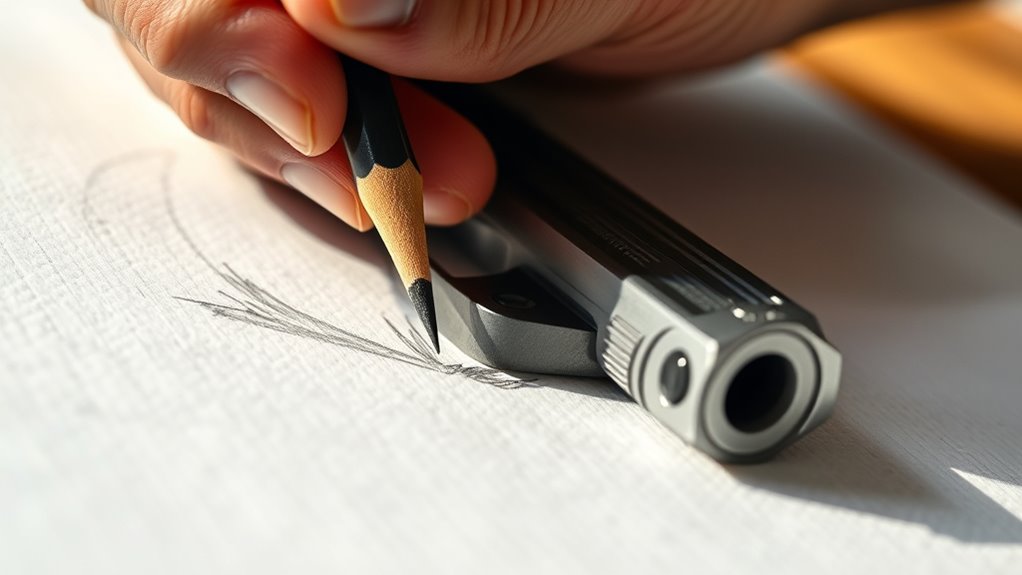
After establishing the basic outline, focus on sketching the slide, which forms the gun’s upper structure. Start with a larger top section that tapers slightly toward the front to capture the slide’s shape accurately.
Then, add the muzzle at the slide’s front as a smaller, rounded rectangle aligned perfectly with the edge. Don’t forget to include serrations along the rear or top of the slide—they add texture and bring your drawing to life.
Keep your lines light and loose at first, so you can adjust proportions easily before darkening them for definition.
- Sketch the slide’s outline with tapering front edges
- Draw the muzzle as a rounded rectangle at the front
- Add serrations to the slide’s rear or top for texture
- Use light lines initially, then refine for clarity and detail
Shape the Frame and Grip for a Solid Foundation
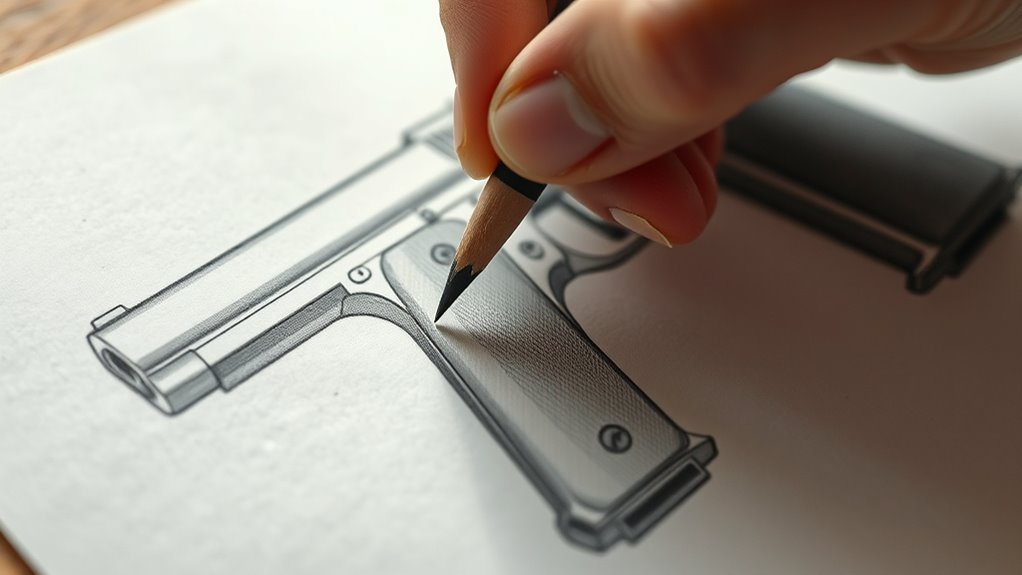
Start shaping the frame and grip by focusing on their proportions to create a balanced and realistic foundation for your gun drawing. Pay close attention to the contours and curves specific to your gun model, as these define its unique character.
Extend the grip downward with a slight tilt to mirror the ergonomic design of real firearms. Incorporate details like the bump near the trigger area and serrated sections on the grip to add texture and depth.
Keep your lines clean and precise; this makes shading and further detailing easier later on. By carefully shaping the frame and grip with proper proportions and subtle details, you build a solid base that supports the entire gun illustration with accuracy and authenticity.
Draw the Magazine and Trigger Guard Details
Two key components you’ll focus on now are the magazine and trigger guard, both essential for adding realism to your drawing. Start by positioning the magazine proportionally beneath the grip, aligning it naturally with the gun’s silhouette.
Focus on the magazine and trigger guard to enhance realism, positioning and aligning them naturally with the gun’s form.
Use consistent dark shading on the magazine to give it depth, adding highlights along edges to mimic reflective metal. For the trigger guard, carefully outline its rounded shape enclosing the trigger, then apply shading techniques like cross-hatching to create volume and texture.
Don’t forget to add small details that enhance realism. Place the magazine precisely under the grip for natural alignment. Shade the magazine darkly, adding edge highlights for metal reflection.
Outline the trigger guard’s curve and add shading for three-dimensionality. And be sure to include screws and texture on the trigger guard and grip panel for detail.
Draw the Sights, Hammer, and Other Upper Hardware
While you focus on the upper part of the gun, draw the front and rear sights on top of the slide. Keep them small and properly aligned for accurate aiming. Create the front sight with a sloped top and the rear sight with slight slopes on both ends, positioning them at the back of the slide.
Next, sketch the hammer with a flat top and curved end that connects smoothly to the slide’s rear. Pay close attention to its shape and placement. Add serrations on the hammer and slide lock to suggest texture and enhance realism.
Use shading to emphasize the metallic surface of the sights, hammer, and other upper hardware. This helps highlight their reflective qualities. These details bring your drawing to life with depth and precision.
Draw Grip Panels, Screws, and Additional Hardware Details
As you move to the lower part of the gun, draw the grip panel on the side of the handle, making sure it fits proportionally and appears slightly smaller than the grip itself. Next, add screws on the grip panels, placing them symmetrically and shading them to create a metallic look.
Don’t forget to include key hardware details near the trigger guard, like the takedown lever and slide lock. Use shading to emphasize edges and add depth.
- Position grip panel screws evenly and shade for realism
- Sketch takedown lever and slide lock with clear shapes
Add small hardware like pins or rivets precisely. Shade edges of grip panels and hardware details for a 3D effect.
These steps bring your drawing to life with authentic grip panels, screws, and hardware details.
Add Gun Serrations and Textures for Realism
Now, focus on adding serrations along the slide’s back by drawing parallel, angled lines that mimic the textured grip. Vary the length and angle of these lines to keep the texture natural and interesting.
Enhance this effect with subtle shading and highlights to bring out the metallic depth. It really helps give the gun a more realistic, tactile feel. Just take your time and play around with the details!
Slide Serration Techniques
To make your gun drawing truly stand out, you’ll want to focus on the slide serrations—the small, angled grooves along the slide’s back. These details add texture and boost realism by mimicking real gun features.
Start by drawing angled, parallel lines to form the slide serration pattern, keeping the perspective consistent. Vary the length and spacing to give a three-dimensional feel. Adding subtle shading within the grooves enhances the metallic texture, making the serrations pop.
Finally, include tiny scratches or wear marks for added authenticity.
- Use angled, parallel lines for uniform slide serrations
- Vary line length and spacing for depth and texture
- Shade within grooves to emphasize metallic realism
- Add fine scratches or wear marks to boost detail
Enhancing Texture Details
Building on your slide serrations, enhancing texture details like additional serrations and subtle wear marks will make your gun drawing more lifelike. Add serrations along the slide’s back and front edges using fine, parallel lines for subtle texture or thicker, angled lines for more pronounced grip.
Incorporate small scratches and wear marks to simulate metal aging, adding authenticity. Pay attention to shading within serrations—vary the intensity to create depth and clearly separate textured areas from smooth surfaces.
Study real gun photos closely to replicate serration placement, size, and shape accurately. This attention to texture and shading really elevates your drawing’s realism, making the gun appear tangible and well-used rather than flat and artificial.
Shade to Add Volume and Depth
How can you make your gun drawing look truly three-dimensional? The key lies in mastering shading techniques to add volume and depth. First, establish a consistent light source to ensure all shading aligns logically.
Then, use varying shading styles like cross-hatching or stippling to create smooth transitions between light and shadow. Focus darker shading on areas away from the light source—under the slide, trigger guard, and grip edges—to emphasize depth. Gradually build layers to enhance curvature and texture.
- Choose a clear light source direction
- Apply darker shading to recessed or hidden areas
- Use cross-hatching or stippling for smooth gradation
- Build shading gradually to highlight volume and form
This approach will bring your gun drawing to life with realistic three-dimensionality. Give it a try, and you’ll see how much more dynamic your drawing becomes!
Add Highlights and Shadows for Stylized Look
Although shading adds depth, incorporating highlights and shadows strategically will give your gun drawing a striking, stylized look. Use shading techniques like cross-hatching and stippling to emphasize light sources on the metallic surfaces.
Leave some areas unshaded or lightly shaded to create highlights that simulate reflections. Apply darker shadows in crevices and edges to boost the three-dimensional effect.
Keep a consistent light direction so highlights and shadows align naturally. Smooth gradations between these elements add polish and style.
| Element | Technique | Effect |
|---|---|---|
| Highlights | Light shading | Simulates metallic shine |
| Shadows | Dark shading | Adds depth in crevices |
| Shading Techniques | Cross-hatching | Defines texture |
| Shading Techniques | Stippling | Emphasizes light variation |
| Light Direction | Consistency | Maintains realism in stylization |
Finalize With Clean Lines and Personal Artistic Touches
Now it’s time to refine your drawing with clean, crisp lines using a fine-tipped pen or digital brush. Erase any leftover pencil marks.
Add unique details that reflect your personal style. These final touches will enhance the visual impact and give your gun drawing a polished, professional look.
Clean Line Refinement
Once you’ve completed your initial sketch, take a fine-tipped pen or digital brush to carefully trace over your lines with smooth, confident strokes. This inking stage brings precision and clarity to your line work. Focus on clean, deliberate lines to elevate your drawing’s overall quality.
Vary line weight to highlight key gun features—thicker for outer shapes, thinner for inner details. Erase or hide the rough sketch lines after inking for a polished, professional look.
Review your lines for consistency and smoothness to guarantee accuracy. Add subtle artistic touches, like highlights or stylized accents, to give your drawing character without overcomplicating it.
Refining your lines this way guarantees your gun drawing looks sharp and ready for the next steps.
Adding Unique Details
With your lines clean and precise, you can focus on adding unique details that bring your gun drawing to life. Start by incorporating texturing to suggest materials like metal or wood, using fine strokes or stippling to add depth.
Stylization lets you infuse personality—experiment with exaggerated shapes or sleek curves that fit your artistic vision. Pay attention to detailing; subtle highlights or reflections on metal parts create a dynamic contrast that emphasizes form.
Use a fine-tipped pen or digital inking tools to enhance clarity, ensuring every line stays sharp and consistent. And don’t forget to continually review your work for any uneven lines or inconsistencies. Correcting them helps maintain a polished, cohesive appearance.
These touches make your drawing uniquely yours, elevating it beyond a simple sketch.
Enhancing Visual Impact
Three key steps will help you enhance the visual impact of your gun drawing: sharpening your lines, varying their weight, and adding personal artistic touches. Start by finalizing your sketch with clean lines to boost clarity and make your artwork more striking.
Use consistent line weight to define shapes clearly and avoid visual clutter. Then, introduce deliberate variations in line weight to emphasize important details and add depth.
Finally, personalize your drawing with unique textures or stylized highlights that reflect your style.
- Erase unnecessary sketch lines for a polished look
- Use smooth contours to maintain clean lines
- Vary line weight to create dynamic composition
- Add artistic touches to make your drawing stand out
These techniques will elevate your gun drawing’s visual impact and professionalism.
Frequently Asked Questions
What Are the Basics of Gun Drawing?
You need to understand the gun’s main parts, keep proportions accurate, and study different types. Use references to capture details like textures and materials, helping your drawing look realistic and convincing every time you sketch a gun.
How to Draw Perfectly Step by Step?
Did you know artists improve 70% faster by practicing step by step? Start with loose sketches, focus on shapes, refine details gradually, adjust shading for depth, and keep refining until your gun drawing looks sharp and realistic.
How to Draw a Pistol Quickly?
You’ll want to sketch basic shapes quickly to block out the pistol’s form. Then, use confident lines for key parts, add minimal details, and shade simply. Practicing from different angles speeds up your drawing process.
Is It Normal for Boys to Draw Guns?
Yes, it’s normal for boys to draw guns as they explore themes like power and adventure. You’re tapping into common interests influenced by media, expressing strength or curiosity, not necessarily showing any violent intent.
Conclusion
Now that you’ve mastered these steps, drawing a gun will feel as natural as riding a bike. With practice, your lines will grow confident, and your shading will bring depth and realism.
Don’t rush—take your time adding details and textures to make your drawing truly stand out. Remember, every artist adds their unique flair, so let your style shine through.
Keep practicing, and soon your gun sketches will look sharp and powerful! Drawing a gun perfectly takes patience, but with each attempt, your skills improve. So grab your pencil, focus on those details, and enjoy the process. Your confidence in drawing guns will grow with every sketch, making your artwork more dynamic and realistic. Keep at it, and you’ll see amazing progress in your gun drawing techniques!