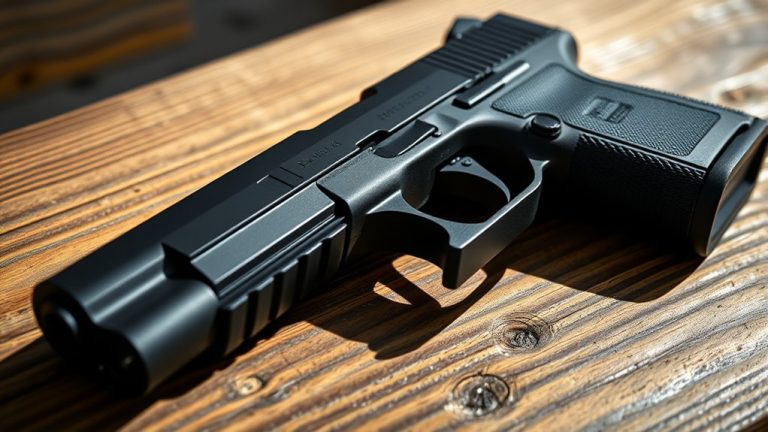
7 Steps to Zero a Pistol Iron Sight
First, make sure your iron sights are securely installed and properly aligned with the bore. Zeroing your pistol iron sights is all about matching your point of aim to where your bullets actually hit. This process is essential for improving shooting accuracy and confidence.
Choose a zeroing distance that fits your shooting needs, whether it’s for close-range self-defense or target practice. Set up a solid rest to keep your pistol steady while you shoot. Fire consistent groups to get reliable data on where your rounds are landing.
Next, measure the center of your shot groups to guide your sight adjustments. Remember, windage adjustments are made on the rear sight, and elevation changes happen on the front sight. Be sure to record your data carefully.
Finally, verify your changes by shooting another group and checking the results. Following these steps will sharpen your accuracy and help build your shooting skills over time. Keep practicing and stay patient!
Key Takeaways
- Securely install and align the front and rear sights. Make sure the rear notch is square and the front sight top is level with the rear sight top.
- Choose an appropriate zero distance based on how you plan to use the pistol. Then, establish a mechanical zero by centering the rear sight windage.
- Use a solid rest, maintain a consistent grip, and keep a steady cheek weld. Fire 3–5 slow rounds per group, giving the barrel time to cool between strings.
- Check where your group centers are offset. Adjust the rear sight windage or front sight elevation in small increments, using the known click values.
- Record all your data, including ammo type, distance, group size, and environmental conditions. Finally, verify your zero with follow-up groups and schedule regular rechecks.
Confirm Iron Sight Installation and Basic Alignment

Before you begin zeroing your pistol’s iron sights, make sure that both the front and rear sights are securely installed and properly aligned. Check that the front and rear sights are tight with no looseness or cant, following the manufacturer’s torque specifications.
Make sure the rear sight notch is square to the bore so the front sight post stays centered when you’re aiming at a distant target. Also, verify that the front sight top is level with the rear sight top to avoid any elevation bias before making adjustments.
Keep a consistent sight alignment by focusing on the front sight and centering it in the rear notch with equal spacing. Try to use the same head angle and cheek weld every time to prevent any shifts in alignment, which can mess with your point-of-impact during zeroing.
Understand Zeroing Concepts: Point of Aim vs. Point of Impact

How do you make sure your shots land where you intend? It starts with understanding the difference between point of aim and point of impact.
The point of aim is where you place your sight deliberately on the target, but the point of impact is where the bullet actually lands after its curved flight path. Proper sight alignment ensures your point of aim matches your intended target, but factors like bullet trajectory and lateral drift mean the point of impact can vary.
Choose Distance and Setup for Zeroing Your Iron Sights

Matching your point of aim to your point of impact depends largely on selecting the right zero distance for your pistol’s iron sights. Choose a zero distance that fits how you’ll use your pistol—close-range for defense or longer for target shooting.
Remember, the bullet trajectory crosses your line of sight twice, so a single aim point doesn’t ensure consistent impact at all distances. Before adjusting, set your pistol’s mechanical zero by centering the rear sight notch windage and setting elevation to your sight’s baseline.
Use consistent ammo to avoid trajectory shifts. Set up a stable rest with sandbags or a cradle to minimize movement when squeezing the trigger.
Unlike a Red Dot sight, iron sights need precise setup at this stage to ensure your point of aim matches impact where it counts.
Fire Groups From a Stable Rest to Assess Impact
Set up a solid rest like sandbags to keep your pistol steady and minimize movement. Keep your shooting technique consistent while firing multiple shots at the same point of aim.
Then, analyze the group pattern to find the true center of impact before making sight adjustments. It’s all about getting a clear picture of where your shots are really landing.
Choosing A Solid Rest
To accurately assess your pistol’s impact, you need a secure rest that keeps the gun steady and consistent between shots. Use a firm bench setup with sandbags and a proper pistol rest to prevent any shifting.
Place the rear of the slide firmly on the support, maintaining the same grip pressure, head angle, and proper grip throughout your practice. This stability lets you focus on sight alignment and trigger control without worrying about movement affecting your groups.
Fire 3–5 slow rounds per group, allowing the barrel to cool between strings to avoid heat-induced shifts. After making sight adjustments, shoot again from the same rest to confirm changes.
This approach ensures your corrections reflect true impact shifts, not inconsistencies caused by your setup or technique. It really helps keep everything consistent so you can trust your results.
Consistent Shooting Technique
Once you have a solid rest in place, your focus shifts to using a consistent shooting method that reveals where your pistol truly hits. Fire three slow rounds, maintaining the same sight picture and perfect alignment—front sight centered in the rear notch with level edges.
Use a smooth trigger press to avoid flinch, keeping follow-through by watching the front sight through recoil. Let the pistol cool between groups to keep the point of impact consistent.
Record distance, group size, and shot order, then adjust sights after finding the group’s center. This way, you’ll know exactly where your shots are landing and can make precise adjustments.
| Step | Action | Purpose |
|---|---|---|
| Sight Picture | Consistent point of aim | Ensures true group location |
| Alignment | Front sight centered | Prevents technique errors |
| Trigger Control | Smooth trigger press | Avoids flinch |
| Follow-through | Watch front sight through recoil | Maintains shot consistency |
| Rest & Cool | Use solid rest, cool pistol | Reduces variables affecting group |
Analyzing Group Patterns
Although maintaining a solid rest and consistent technique is key, you need to analyze your shot groups carefully to understand how your sights are performing. From a stable bench with your rear sight aligned, fire 3–5 slow shots and record distance and ammo before adjusting.
Focus on group centers, not individual holes, to assess true shot placement.
A vertical group suggests elevation issues; horizontal spread points to windage errors. Diagonal patterns may indicate combined elevation and windage or aiming inconsistencies.
Scattered groups or flyers mean fundamentals like front sight focus or trigger control need review.
Measure group center shifts in inches or mils to confirm sight click values and avoid overcorrections.
This method works well whether zeroing iron sights or red dots.
Measure Shot Group to Plan Adjustments
After firing your group, take a close look at its size to understand your consistency. Next, find the center of that group, which shows where your shots are actually landing.
This center point helps you plan precise adjustments to bring your sights in line. It’s all about seeing where you are versus where you want to be. Keep it simple and steady.
Assess Group Size
A tight, well-defined shot group gives you the most dependable information for adjusting your pistol’s iron sights. Before making any elevation or windage changes, fire 3–5 slow, controlled shots from a firm rest.
Your sight must provide consistent results, so consistent practice is key. Practice aligning your sights carefully to avoid flinching or inconsistent focus, which can cause larger groups and misleading adjustments.
- Measure group size as the extreme spread, from the farthest center-to-center points.
- Smaller groups increase your confidence in making precise click adjustments.
- Large groups mean pause and diagnose issues like poor sight alignment or flinch.
- Use group size to decide adjustment scale: smaller changes for tight groups, larger only if consistent.
This approach ensures your zeroing process stays accurate and repeatable.
Identify Group Center
How do you pinpoint the exact center of your shot group to plan sight adjustments? First, fire 3–5 slow shots from a solid rest at your initial zero distance, keeping consistent target focus and noting your exact point of aim.
Measure the group’s horizontal and vertical spread from extreme-to-extreme to find its approximate center. Compare this center to your point of aim, observing offsets in millimeters or inches.
This offset reveals how your alignment and sight picture within the rear sight need adjusting. Convert the measurement into clicks using your sight’s click value—usually 0.1 mil or about ¼ MOA per click—and adjust accordingly.
Repeat the process, fine-tuning until the group center consistently aligns with your point of aim. That way, you ensure a reliable zero every time.
Adjust Rear Sight Windage and Front Sight Elevation
Once you’ve established a known mechanical zero, you’ll focus on adjusting the rear sight for windage and the front sight for elevation to align your point of impact with your point of aim.
Start by centering the rear sight windage, then adjust it left or right to move the point of impact accordingly. For elevation, raise or lower the front sight—the higher the front sight, the lower the impact point, and vice versa.
Center rear sight windage first, then adjust left or right; raise or lower front sight for elevation changes.
Always make adjustments from a solid rest and fire groups to verify changes.
Remember to:
- Center the front sight precisely for consistent aiming
- Adjust rear sight windage to correct horizontal deviation
- Use sight clicks to track each adjustment accurately
- Cool the barrel between groups to maintain consistency
These steps ensure your iron sights are properly zeroed and reliable.
Record Zero Data, Verify Results, and Schedule Rechecks
Before changing any settings, record all relevant zeroing data—your firearm’s make and model, exact ammunition details, shooting distance, point of aim, group size, and environmental conditions such as temperature and wind. This helps you track and replicate your setup accurately.
Always record your initial zero before making any adjustments. To verify your zero, fire practice shots from a solid rest using a consistent process, like three slow shots. Base your adjustments on the group’s center.
Make small sight changes with known click values. Let the barrel cool between strings to avoid shifts in the point of impact.
After you’ve aligned the point of aim and impact, recheck at different distances to confirm accuracy. It’s a good idea to schedule rechecks after major changes like new ammo, weather shifts, or rough handling.
Don’t forget to document everything so you can maintain a reliable zero over time. Keeping good records makes all the difference!
Frequently Asked Questions
Can I Zero My Pistol Iron Sights Without a Shooting Rest?
Yes, you can zero your pistol iron sights without a shooting rest, but it’s harder to stay steady. Try bracing your arms against a solid surface or shooting from a bench to improve accuracy while adjusting your sights.
It might take a bit more patience and practice, but it’s definitely doable. Just keep your movements slow and deliberate to get the best results.
How Often Should I Re-Zero My Pistol Iron Sights?
You should ensure re-zero your pistol iron sights whenever you notice accuracy shifts, after cleaning, or if you drop your pistol.
Regularly checking them ensures consistent performance and keeps your shots hitting where you aim.
It’s a good habit to make it part of your routine, so you don’t get caught off guard.
That way, your pistol stays reliable whenever you need it.
What Tools Are Best for Adjusting Iron Sights Precisely?
You’ll want a sight adjustment tool or a small brass or drift punch—like a painter’s brush against a canvas, delicate yet precise.
Pair that with a sturdy bench rest, and you’ll zero your sights with confidence and ease. It really makes the whole process smoother and more accurate.
Can Weather Conditions Affect the Zeroing Process?
Yes, weather conditions like wind, temperature, and humidity can impact your zeroing process. They can change bullet trajectory and sight alignment, so you should account for them to ensure your pistol iron sights stay accurate in different environments.
It’s pretty important to keep an eye on these factors when you’re zeroing. Small changes in the weather can make a noticeable difference in how your shots land. So, adjusting for weather helps keep your aim true no matter where you’re shooting.
Is It Necessary to Wear Shooting Glasses When Zeroing Sights?
Yes, you should always wear shooting glasses when zeroing sights. They protect your eyes from debris, spent casings, and accidental discharge.
Safety comes first, so don’t skip this essential precaution during any shooting activity. It’s a simple step that can prevent serious injuries.
Conclusion
Zeroing your pistol iron sight is like tuning a fine instrument—precise adjustments make all the difference. By following these steps, you guarantee your shots consistently hit where you intend.
Remember to confirm your setup and fire from a stable rest. This helps ensure your adjustments are accurate and repeatable.
Make careful sight adjustments as needed. Don’t rush—small changes can have a big impact on your accuracy.
Don’t forget to record your zero data. This way, you can track your progress and make quick corrections in the future.
Verify your results regularly to maintain your zero, especially after handling or cleaning your pistol.
With practice and patience, your iron sights will become a reliable extension of your aim every time you shoot. Zeroing your pistol iron sight properly enhances your confidence and shooting performance, turning every shot into a consistent hit. Keep at it, and you’ll master your sights in no time.